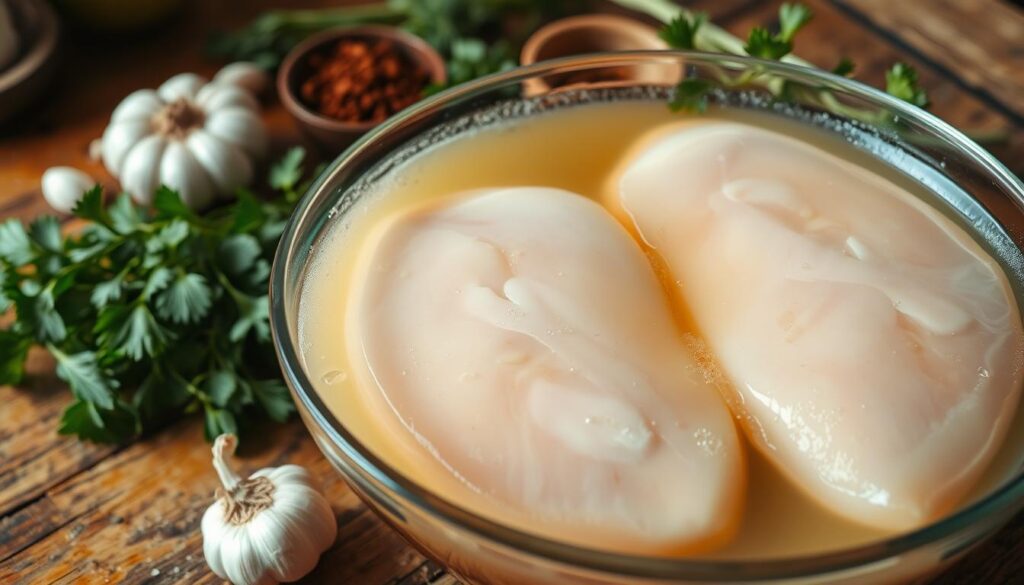
As a busy home cook, I’ve struggled to get juicy, flavorful chicken breasts. That’s why I’m excited to share brining with you. It’s a simple technique that boosts your chicken game.
Imagine biting into a chicken breast that’s moist, tender, and full of flavor. It’s not just a dream. Brining makes it real.
Brining is a secret used by chefs and home cooks to improve chicken dishes. It involves soaking chicken breasts in a saltwater solution. This adds flavor and texture that cooking alone can’t match.
The science behind brining is interesting. But the taste and texture it brings are even better. Your chicken will be perfectly seasoned and juicy.
In the next pages, I’ll show you how to brine chicken breasts. We’ll cover choosing the right ingredients and timing. This guide is for both seasoned cooks and beginners. It will help you make restaurant-quality chicken breasts every time. So, let’s start and learn how to brine chicken breast for amazing results.
Table of Contents
Understanding the Science Behind Chicken Brining
Brining chicken breasts changes the meat’s texture and taste. It uses salt, water, and proteins. This method makes the chicken more enjoyable to eat.
How Salt and Water Transform the Meat
Brining uses osmosis and diffusion. Salt breaks down muscle proteins. This lets the meat soak up more water and stay moist while cooking.
The proteins also change, making the meat tender. Salt seasons the chicken from the inside, boosting its flavor.
Benefits of Moisture Retention
Brining keeps chicken breasts moist. The saltwater solution helps the chicken keep its juices. This makes the chicken juicy and full of flavor.
Protein Structure Changes During Brining
Brining changes the chicken’s protein structure. Salt breaks the protein bonds, making them softer. This makes the chicken tender and juicy.
Learning about brining lets you make chicken breasts better. You’ll get moist, tasty, and tender chicken every time.
Essential Ingredients for the Perfect Chicken Brine
Making the perfect chicken brine is easy and can elevate your dishes. It starts with water, salt, and some seasonings if you like.
Begin with 4 cups of cold water. Add 6 tablespoons of Diamond Crystal kosher salt, 4 1/2 tablespoons of Morton’s kosher salt, or 3 tablespoons of fine/table salt. This mix is key for a moist and flavorful chicken.
To make your best brine recipes for chicken even better, add some aromatics. Try peppercorns, garlic, herbs like rosemary and thyme, and bay leaves. A squeeze of lemon or orange can also add a nice touch. For more flavor, mix in 1 tablespoon of garlic granules when you’re brining for a longer time.
| Ingredient | Quantity (for 4 cups of water) | Purpose |
|---|---|---|
| Water | 4 cups | The base for the brine |
| Kosher Salt (Diamond Crystal or Morton’s) | 6 tbsp or 4 1/2 tbsp | Enhances moisture retention and flavor |
| Fine/Table Salt | 3 tbsp | Enhances moisture retention and flavor |
| Peppercorns, Garlic, Herbs (Rosemary, Thyme, Sage), Bay Leaves | Optional, to taste | Adds aromatic complexity and depth of flavor |
| Garlic Granules | 1 tbsp | Enhances overall flavor, especially for longer brining times |
With these chicken breast brine ingredients, you’re ready to make delicious, moist chicken. Your taste buds will thank you.
How to Brine Chicken Breast: Step-by-Step Instructions
Brining chicken breasts makes them tender, juicy, and full of flavor. It’s a simple method that changes the texture and taste of your poultry. Here’s how to brine chicken breasts for the best results.
Preparing the Brine Solution
First, mix cold water with salt. Use 1 cup of water for every 1 tablespoon of salt. You can add garlic, herbs, or spices to make it taste even better. Once the salt dissolves, your brine is ready.
Proper Chicken Submersion Techniques
- Put the chicken breasts in a big, non-reactive container like a bowl or plastic bag.
- Pour the brine over the chicken, making sure it’s fully covered.
- Then, cover the container and put it in the fridge for 30 minutes to 4 hours. This depends on how thick the chicken is.
Temperature Control Methods
Keeping the right temperature is key when brining chicken. For brining times under 30 minutes, you can keep the chicken at room temperature. But for longer times, refrigerate it to keep it safe and prevent bacteria.
| Brining Time | Temperature |
|---|---|
| Under 30 minutes | Room temperature |
| Over 30 minutes | Refrigerated |
To brine chicken successfully, make sure it’s fully covered in the brine. Also, keep the right temperature. Follow these steps to get juicy, flavorful chicken breasts every time.
Optimal Brining Times and Temperature Guidelines
Finding the perfect brine for chicken breasts is key. The brining time greatly affects the meat’s texture and taste. For chicken breasts, brining time usually ranges from 30 minutes to 1 hour, based on the meat’s thickness.
Brining for 30 minutes gives a lightly seasoned, juicy chicken. Brining for 1 hour makes the meat tender and well-seasoned. But, brining for more than 2 hours can make the chicken too salty and tough.
It’s important to use cold tap water for brining. Warm water can stop the brine from getting into the chicken. Cold water helps the brine spread evenly, making the meat flavorful and tender.
| Brining Time | Texture and Flavor Impact |
|---|---|
| 15 minutes | Lightly salted flavor |
| 30 minutes | Slight tenderness |
| 1 hour | Optimal seasoning and tenderness |
| 2 hours | Approaching over-salting |
| 4 hours | Too salty |
| 8 hours | Overly salty, spongy texture |
By sticking to these brine time for juicy chicken and temperature tips, you can improve your chicken breast brining techniques. This way, you’ll always get tender, tasty chicken breasts that everyone will love.

Best Salt Types and Ratios for Chicken Brining
To get the perfect brine for chicken breasts, you need to know about different salts and their ratios. The salt you pick and how much you use can greatly affect the taste and texture of your chicken.
Kosher Salt vs. Table Salt
Kosher salt is best for brining because of its big crystals and how well it dissolves. It spreads saltiness evenly in the meat. For 4 cups of water, use 6 tablespoons of Diamond Crystal kosher salt or 4 1/2 tablespoons of Morton’s kosher salt. Don’t use iodized table salt, as it can taste metallic.
Calculating Perfect Salt-to-Water Ratios
The basic brine ratio is 1 tablespoon of salt per cup of water. This is a good starting point. But, you can tweak the ratios to your liking. A higher salt ratio means faster brining, but watch out for over-brining.
Common Salt Measurement Mistakes
Getting the salt measurement right is key for a great brine. Don’t make mistakes like using the wrong salt or measuring wrong. Remember, different salts have different crystal sizes, so volume measurements change. Always check the specific guidelines for your salt to get the right brine ratios for chicken.
Adding Flavoring Elements to Your Brine
Brining chicken breast opens up a world of flavor. You can add many ingredients to your brine. These will make your chicken taste amazing.
Start with basics like peppercorns, crushed garlic, rosemary, thyme, sage, bay leaves, or whole cloves. For more flavor, add 1 tablespoon of garlic granules to your brine. Blend the brine with onion, garlic, and herbs for a stronger taste.
Want something zesty? Add lemons or oranges to your brine. Their tangy flavor will contrast nicely with the chicken.
Getting the right mix of flavors is key. Try different ingredients to find what you like best. This will make your chicken truly delicious.

Common Brining Mistakes to Avoid
Brining is a great way to make chicken breasts juicy and full of flavor. But, there are mistakes to watch out for to get the best results. One big mistake is overbrining, which can make the chicken spongy and too salty. Boneless chicken breasts should only be brined for 2 hours to avoid this.
Keeping the brine at the right temperature is also key. If you leave it at room temperature for too long, it can start to cook the meat. This can also be a food safety risk. Always refrigerate the brine if you’re brining for more than 30 minutes.
Salt Content Errors
Another mistake is using the wrong salt or too much of it. Table salt can make the chicken too salty. It’s important to use kosher salt and get the salt-to-water ratio just right. This will help keep the chicken moist and flavorful.
Don’t rinse the chicken after brining. This can spread harmful bacteria. Instead, gently pat it dry with paper towels before cooking. Also, never reuse brine as it can become contaminated.
By avoiding these common mistakes, you’ll make perfectly brined chicken breasts every time. With the right techniques and care, you can make the most of this simple yet powerful cooking method.
Storage and Food Safety Guidelines
After brining your chicken, it’s key to follow storage and food safety tips. You can store brined chicken in the fridge for up to 3 days. Or, freeze it for up to 6 months. Freezing keeps the brine in the meat as frozen water, saving moisture and flavor.
For safety, brine chicken in the fridge, especially if brining takes over 30 minutes. Always throw away used brine to avoid bacteria. Also, clean and disinfect all surfaces that touched raw chicken to stop cross-contamination.
Knowing how to store and keep your brined chicken safe ensures great taste and moisture. This is true whether you’re using brine vs. marinade for chicken or trying easy chicken brine methods.

